Factory manual / Early Access • V16.4 rules
Move products between floors with a working Hay Lift
Build the upper receiving route first, then snap a Hay Lift to a wall’s belt port or a belt end in the air and connect the lower supply. Read the arrows on the lift controls so it carries goods toward the intended floor. Lifts can pass through platforms; no cut-out is needed. Check the first load leaving the top, then keep the final product scanner on every route that can reach a destination.
Updated 2026-11-17 · Early Access • V16.4 rules
On this page
Follow the route
Choose an upper destination and access route
Decide where the product should go before raising a lift. Leave a walkway or catwalk to reach its upper connection, and keep the vertical run beside power and water services. A separate lift for each product route is easier to trace than several crossing runs in one shaft.
 Open full-size image ↗
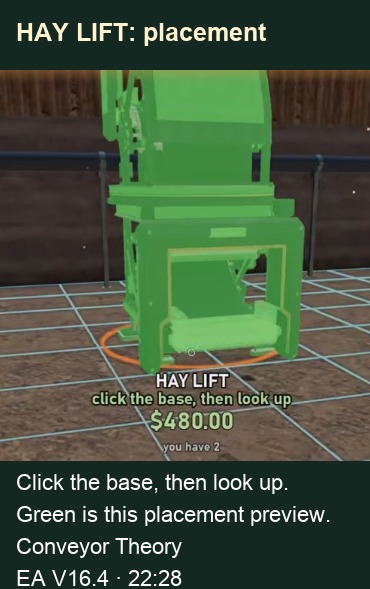
Conveyor Theory, EA V16.4 at 22:28. This is a placement preview; the $480 shown belongs to that save. Snap the lift to an actual connector
Equip Hay Lift. Its placement prompt says to click the base, then look up to set the rise. Aim at the wall belt port or the end of a belt suspended in the air. The building hologram lights the selected port and locks when joined. Machine ports sit on the build grid, so inspect the highlighted connector rather than aligning only by the machine body. A belt that looks close to a lift is not necessarily attached.
Set the travel direction and complete both ends
Use the arrows on the lift’s controls to move goods toward the receiving floor. Connect the lower incoming belt to the intake and the upper outgoing belt to the destination. If you meant to lower goods, reverse the relationship. Watch a load enter, travel and leave before extending the rest of the floor.
Use platform and wall features deliberately
Lifts and pipes go through platforms. Wall bays provide belt ports at floor level or one metre up, as well as a roller door. The Compact 2 m Hay Lift fits platforms in either orientation and can sit on or hang from a door. Pick it for a small level transition instead of forcing a full-size arrangement into a doorway.
Keep the outgoing route protected
Moving a product upstairs does not remove its needle risk. If a packaging machine is upstairs, put the final scanner after that packaging stage before its exit splits. A common scanner can cover multiple upper lines only when all those outputs merge before it.
Read a stopped lift from the receiving end
A full upper outfeed blocks what comes after the lift. Clear that destination first; then check the lift’s power and the incoming belt direction. If no load arrives below, trace the supply. If old gameplay shows loads being thrown off at high belt speed, note that V15.4 fixed that failure; do not assume every current stall is the old bug.
Recheck utilities after expanding the shed
V16.4 makes lifts faster and reduces many wall, roof, catwalk and ramp costs. It also moves lamps and wall outlets with an expanded shed wall and removes cables that become too long. After an extension, inspect the lift circuit and any water riser before assuming the vertical connection moved.
Completion check
Check the result
A load passes from the lower belt through the lift onto the upper outfeed in the intended direction, reaches its destination and still crosses its required final scanner.
If it still fails
If the upper floor is empty, check the upper outfeed, the lift’s direction and power, then the lower supply—in that order. If placement is red, inspect the named obstruction and highlighted port; do not hide an unconnected gap with extra belts.
Continue from here
Sources & version
Written for Early Access V16.4. Earlier gameplay images are labeled where used; diagrams explain connections, not exact building dimensions or measured throughput.