Factory manual / Early Access • V16.4 rules
Aim a working Rake onto its belt and move it as the pile shrinks
Walk to the existing Piston Rake and press E. In its panel, drag the landing ring to aim at the receiving belt; drag the rest of the preview to turn the Rake and use HOW FAR IT THROWS to adjust the distance. Check ON, available power and space on the belt. When the pile shrinks away, use MOVE IT’s left (Back) or right (Forward) arrow to reposition the machine, then check the landing ring again. Close the panel and watch a real wad land on the belt and travel away.
Updated 2026-11-17 · Early Access • V16.4 rules
On this page
Follow the route
Open the existing Rake’s panel
Walk up to the Piston Rake and press E. Locate the live machine preview, its landing ring and the HOW FAR IT THROWS control below it. Keep the receiving belt in mind: the task is to make the thrown hay land on that belt, with room for it to move onward.
Set the landing point on the receiving belt
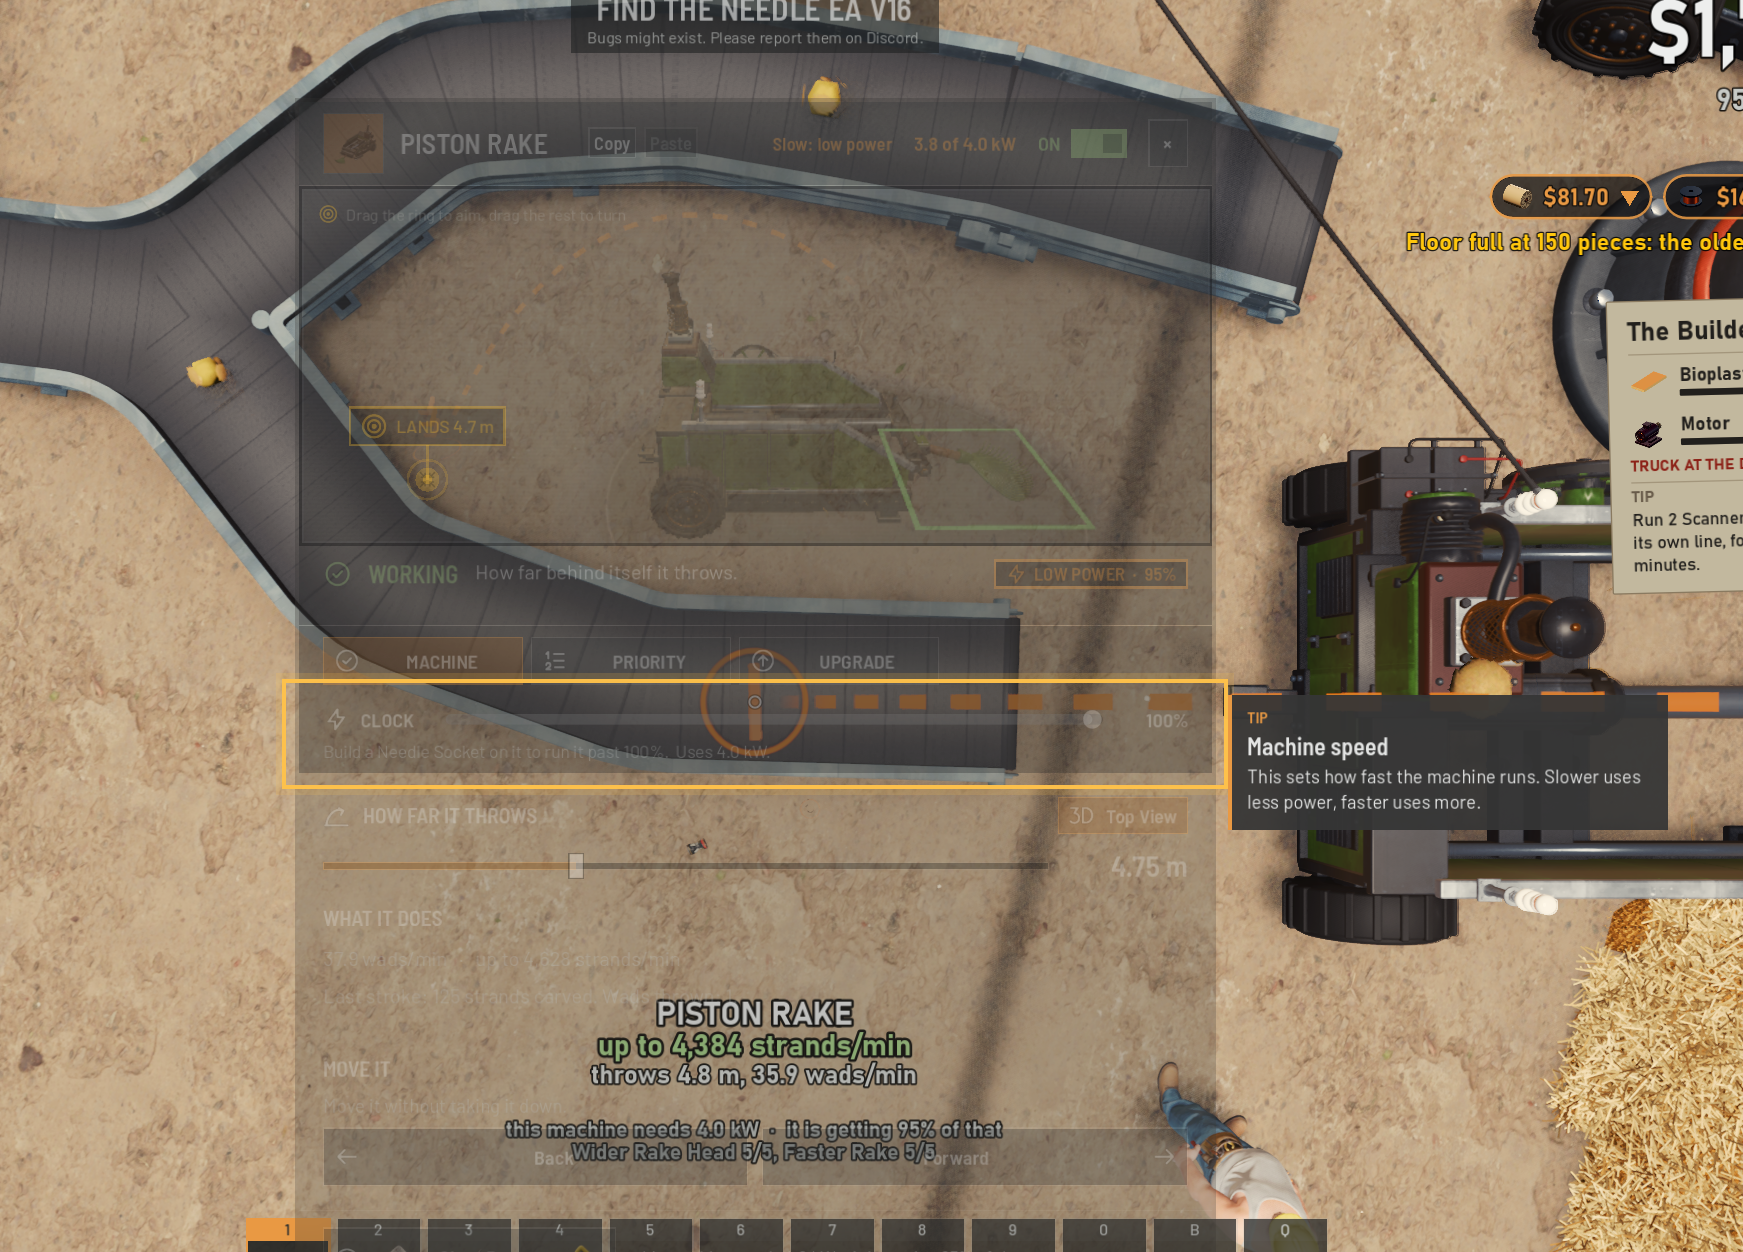
Drag the ring in the live preview to aim. The panel’s instruction says to drag the rest of the preview to turn the machine. Use HOW FAR IT THROWS to adjust the throw distance and check the LANDS marker against the belt. The illustrated distance is one machine’s setting; choose the distance that reaches your actual belt.
 Open full-size image ↗
Official V16.4 illustration. LANDS marks the throw’s landing point; the shown distance is an example. Check power and room on the belt before changing the aim again
Make sure the Rake is ON. Read its power and running status: Slow: low power means it is receiving less power than it wants. Check the connected power line if that warning appears. If the receiving belt is full, clear the downstream blockage first. Rakes wait for belt space and can throw into gaps on a fast belt, so a full belt can explain a pause even when the landing point is correct. After a Wider Rake Head upgrade, also read the card’s increased power requirement.
Move the Rake when the shrinking pile moves out of reach
In the same panel, find MOVE IT. Use the left arrow (Back) or right arrow (Forward) to reposition the machine; the panel describes this as moving it without taking it down. Check which direction brings it toward the remaining hay. After moving, inspect the landing ring and throw distance again because the belt is now in a different position relative to the Rake.
Open full-size image ↗Under MOVE IT, use the left arrow for Back. Recheck the landing point after moving the Rake. Open full-size image ↗Use the right arrow for Forward in the same MOVE IT row. Both views preserve the official V16.4 panel. Watch an actual wad land and keep moving
Close the panel and watch several throws. A wad should land on the receiving belt and travel into the next part of the line. If it lands on the floor, reopen the panel and correct angle or distance. If it lands correctly but the Rake later pauses, check power, remaining hay and downstream belt space. Repeat the landing check after moving the Rake or rebuilding its receiving belt.
Completion check
Check the result
The Rake reaches the remaining hay, its thrown wads land on the intended belt, and the receiving line carries them onward.
If it still fails
For hay landing beside the belt, correct the LANDS ring and throw distance. For a pause with a full belt, clear the downstream line. For Slow: low power, inspect the connected power supply. After moving the Rake, check its reach into the remaining hay and its landing point separately.
Continue from here
Sources & version
Written for Early Access V16.4. Earlier gameplay images are labeled where used; diagrams explain connections, not exact building dimensions or measured throughput.