Factory manual / Early Access • V16.4 rules
Put scanners where no finished product can bypass them
Put the needle-checking scanner after the last packaging machine and before any branch to the Selling Stand, Depot or order route. Multiple outputs may share a scanner only if they merge before it. If scrap is jamming an earlier hay machine, remove it upstream with a Smart Splitter Scrap door or a separate scanner; the final product scanner is too late to protect that intake.
Updated 2026-11-16 · Early Access • V16.4 rules
On this page
Follow the route
Distinguish the two scanner jobs
Source-side sorting keeps metal out of hay machines. Final-product scanning checks packages that may contain a needle. One location cannot cover both jobs when packaging sits between them. Keep the last packaging stage upstream of the final scanner, including a separate Hay Silo output if that can feed a destination.
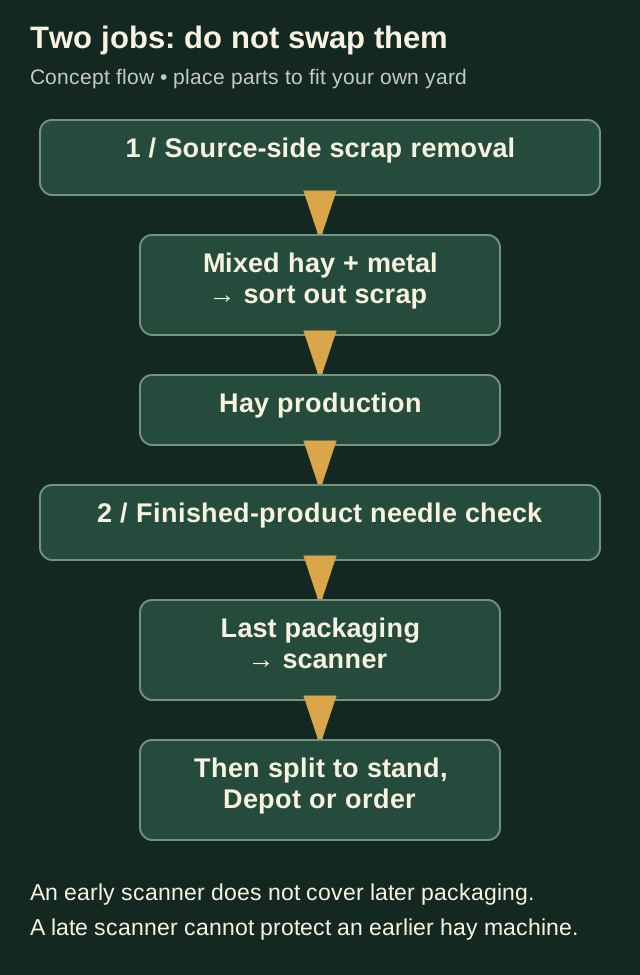
Two different checkpoints. An early scan does not cover later packaging; a late scan does not prevent an earlier scrap jam. Make the load pass through the frame
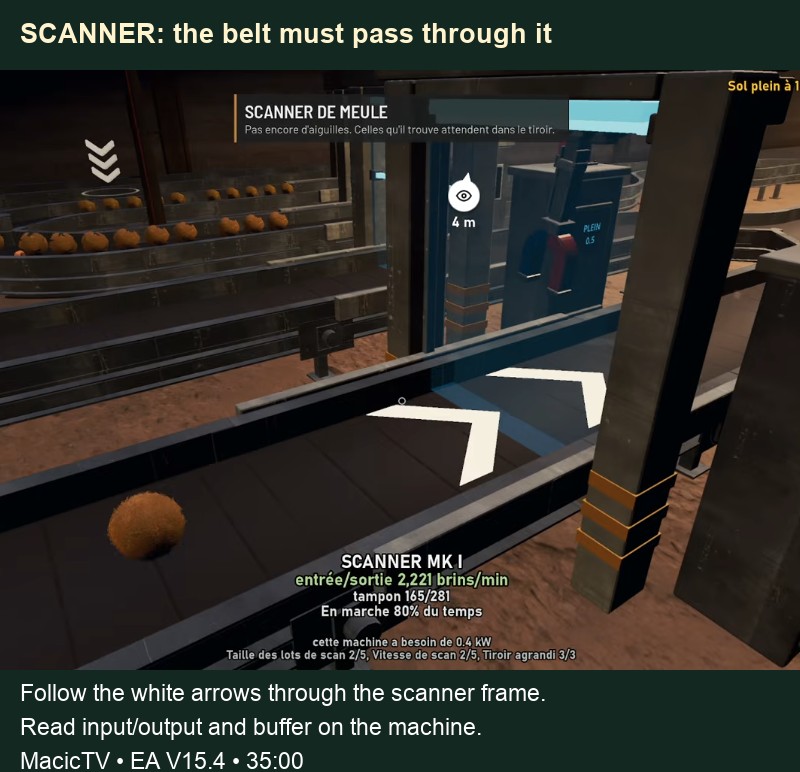
Connect the output belt of the last packaging machine through the scanner frame, then continue to the destination junction. A scanner standing beside a belt does not cover the belt. Read the belt arrows and watch a load cross the frame, rather than judging only by how close the machine looks.
 Open full-size image ↗
MacicTV EA V15.4 at 35:00. This identifies the frame, belt and live panel; the displayed rate is from that save, not a universal scanner capacity. Audit every branch
Trace one finished item to each possible exit: stand, Depot and order delivery. At every junction, ask whether either door can avoid the scan. If two packaging lines merge before one gate, that gate can cover both; if they have independent exits, gate each route. Recheck the route whenever you add a splitter or another production line.
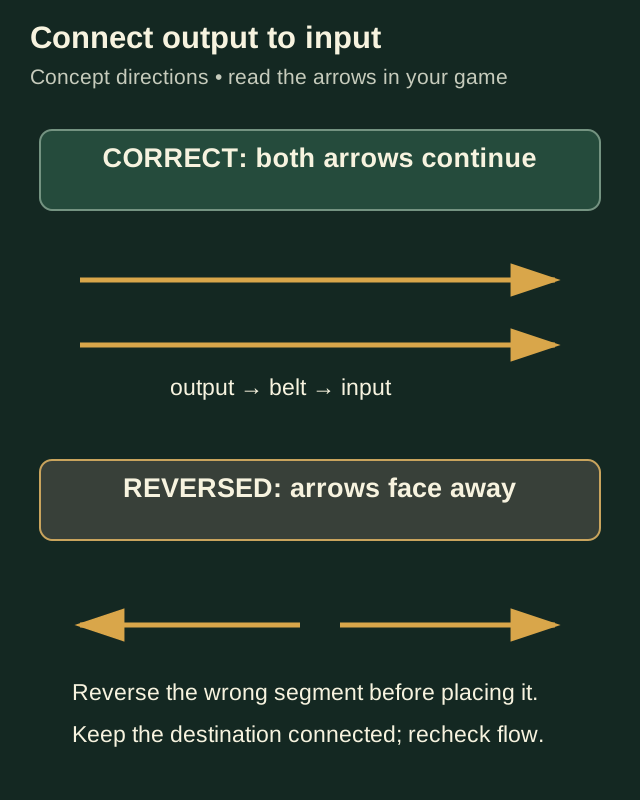
Direction check. The diagram describes connections; it is not a placement preview from the game. Do not treat storage as an exception
Place the scan before a Depot holding packaged goods. A needle can wait inside stored stock; the Depot is not a substitute for a gate. Give overflow a connected outfeed route. With no belt after the Depot, surplus drops to the ground rather than being automatically sold.
Read the queue before buying upgrades
A long queue before the scanner, upstream machines with full outputs, and little arriving at the stand point to the gate or its outfeed. First check that the scanner has power and its output is clear. Watch its input/output, buffer and running percentage with goods arriving; a single snapshot is not enough to diagnose the limiting machine.
What the stopped line is telling you Observation Next check Yellow lightning / power warning Read the circuit supply and demand; do not diagnose scrap from this icon. No load reaches the frame Follow the incoming belt and its arrows upstream. Output belt is full Clear the destination or wrong connection before upgrading the scanner. Buffer keeps filling with a clear outfeed Consider scan upgrades or parallel gates. Add capacity without making a bypass
Scan finished packages instead of sending all loose wads through one final gate. If that gate still cannot keep up, feed parallel scanners and merge their scanned outputs, or buy Scan Batch Size and Scan Cycle Speed upgrades. Keep every parallel branch gated; an unscanned overflow lane solves the queue by losing the needle check.
Empty the correct drawer
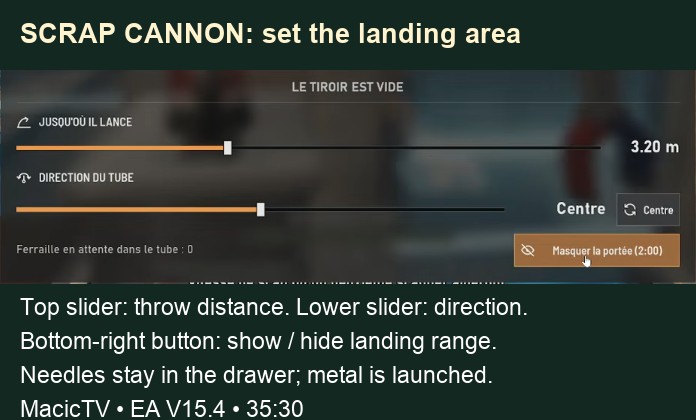
Aim at the scanner and press E to open its drawer. Needles it finds stay in that drawer; metal goes through the scrap cannon. Collect needles from every scanner, including early scrap-removal machines. Use the distance and direction sliders and the landing-range view to keep launched scrap off the product line.
 Open full-size image ↗
French EA V15.4 interface, translated in the labels. V16.4 also adds a Top View button for throwing machines; this crop does not show that newer button.
Completion check
Check the result
Each finished-product route crosses a working scanner before it can reach storage, selling or an order. Goods continue beyond the gate, and found needles can be collected from its drawer.
If it still fails
If the scanner seems idle, confirm goods actually cross its frame, power is connected and the output can accept them. If needles are missing, inspect every scanner drawer and packaged stock in the Depot before searching the pile again. Sold needle-bearing products return their needle to the pile.
Continue from here
Sources & version
Written for Early Access V16.4. Earlier gameplay images are labeled where used; diagrams explain connections, not exact building dimensions or measured throughput.